
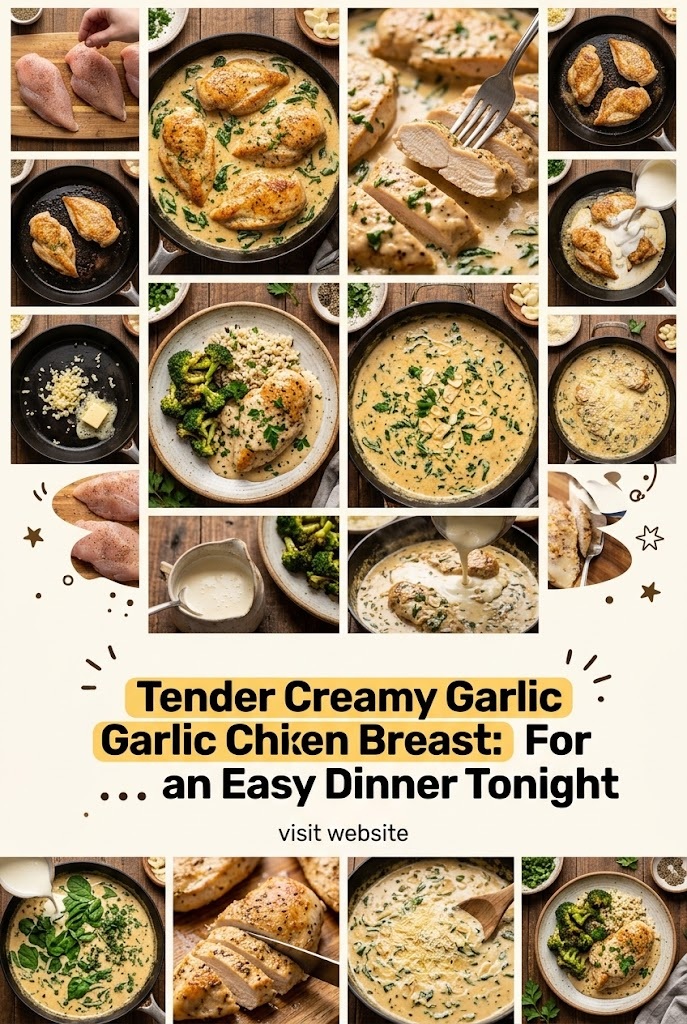
Tender Creamy Garlic Chicken Breast: For an Easy Dinner Tonight
There is a universal culinary challenge that home cooks face every single evening: how to transform the humble, often-maligned chicken breast into a masterpiece that is juicy, flavorful, and sophisticated enough for a dinner party, yet simple enough for a Tuesday night. We have all been there—staring at a pack of boneless, skinless chicken breasts, fearing the inevitable dryness that usually accompanies this lean protein.
Enter the Tender Creamy Garlic Chicken Breast. This dish is not just a recipe; it is a revelation. It combines the searing technique of a high-end steakhouse with a velvety, aromatic sauce that rivals the best Italian bistros. In this comprehensive guide, we will explore every facet of creating this dish, from the science of meat fibers to the alchemy of a perfect garlic cream reduction.
Why This Recipe is a Weeknight Game Changer
When we talk about “easy dinners,” we often sacrifice quality for speed. We reach for pre-packaged sauces or frozen meals. However, this creamy garlic chicken proves that you can have a gourmet experience in under 30 minutes.
The magic lies in the balance of textures. You get a golden, crispy exterior on the chicken, which then bathes in a pool of garlic-infused cream that softens the edges and infuses the meat with moisture. It is low-carb, high-protein, and infinitely customizable. Whether you are following a Keto lifestyle or simply trying to feed a hungry family, this recipe checks every box.
The Foundation: Sourcing the Perfect Chicken
Before you even turn on the stove, the quality of your ingredients dictates the success of your meal. For the tenderest results, look for the following when shopping:
1. Air-Dried vs. Water-Chilled
Most commercial chicken in the USA is water-chilled, meaning the birds are cooled in a communal vat of cold water. This adds “water weight” and can lead to a rubbery texture. If your budget allows, look for air-chilled chicken. It sears better and retains its natural flavor.
2. Thickness and Size
Try to find chicken breasts that are uniform in size. If one is a giant 12-ounce breast and the other is a petite 6-ounce piece, they will never cook evenly. We will discuss pounding the meat later, but starting with similar sizes makes your job much easier.
3. Freshness Indicators
The meat should be a pale pink color with very little odor. Avoid chicken that looks gray or has an excessive amount of liquid in the packaging.
Essential Kitchen Tools for Success
To achieve that professional-grade sear and a silky sauce, a few key tools are non-negotiable:
- A Heavy-Bottomed Skillet: Cast iron or heavy stainless steel (like All-Clad) is preferred. These materials retain heat exceptionally well, ensuring the chicken sears rather than steams.
- A Meat Mallet: Essential for evening out the thickness of the breast.
- An Instant-Read Thermometer: This is the only way to guarantee your chicken is cooked to exactly 165°F (74°C) without overdoing it.
- A Fine Mesh Grater (Zester): For the garlic and Parmesan cheese to ensure they melt seamlessly into the sauce.
The Master Recipe: Tender Creamy Garlic Chicken Breast
Ingredients
For the Chicken:
- 2 large boneless, skinless chicken breasts (sliced horizontally into 4 cutlets)
- ½ cup all-purpose flour (for dredging; optional for Keto)
- 1 teaspoon smoked paprika
- 1 teaspoon onion powder
- Salt and freshly cracked black pepper to taste
- 2 tablespoons extra virgin olive oil
- 2 tablespoons unsalted butter
For the Creamy Garlic Sauce:
- 6-8 cloves of fresh garlic, minced or pressed (don’t be shy!)
- 1 cup heavy cream (double cream)
- ½ cup high-quality chicken bone broth
- ½ cup freshly grated Parmesan cheese
- 1 teaspoon Italian seasoning (or a mix of dried oregano, basil, and thyme)
- ½ teaspoon red pepper flakes (optional, for a hint of heat)
- Fresh parsley, chopped for garnish
- Fresh lemon wedges for serving
Step-by-Step Instructions
Step 1: Prep and Pound
Take your chicken breasts and lay them flat on a cutting board. Place your hand on top and carefully slice them in half horizontally (butterfly style) to create four thinner cutlets. Place these cutlets between two sheets of plastic wrap or in a gallon-sized Ziploc bag. Use the flat side of a meat mallet to gently pound them until they are an even ½-inch thickness. This ensures every bite cooks at the same rate.
Step 2: The Seasoned Dredge
In a shallow bowl, whisk together the flour, smoked paprika, onion powder, salt, and pepper. Dredge each chicken cutlet in the flour mixture, shaking off any excess. This light coating creates a “crust” that holds onto the sauce and prevents the meat from drying out during the high-heat sear.
Step 3: The Perfect Sear
Heat the olive oil and 1 tablespoon of butter in your skillet over medium-high heat. Once the butter is foaming and the pan is hot, add the chicken. Do not crowd the pan; work in batches if necessary. Sear for 4-5 minutes per side until golden brown and cooked through. Remove the chicken from the pan and set it aside on a plate, tented with foil.
Step 4: Aromatics and Deglazing
Lower the heat to medium. Add the remaining tablespoon of butter to the same pan. Toss in the minced garlic and sauté for only 30-60 seconds—just until fragrant. Do not let the garlic burn, or it will turn bitter. Pour in the chicken broth, using a wooden spoon to scrape up all the brown bits (the fond) from the bottom of the pan. This is where the deep flavor lives!
Step 5: Building the Creamy Sauce
Pour in the heavy cream and bring the mixture to a gentle simmer. Let it bubble for 2-3 minutes until it starts to thicken slightly. Whisk in the Parmesan cheese, Italian seasoning, and red pepper flakes. Continue to whisk until the cheese is melted and the sauce is velvety.
Step 6: The Reunion
Place the chicken cutlets (and any juices collected on the plate) back into the skillet. Spoon the sauce over the chicken and let it simmer together for another 1-2 minutes. This allows the flavors to meld and ensures the chicken is piping hot.
Step 7: Garnish and Serve
Sprinkle with fresh parsley and serve immediately with a squeeze of fresh lemon juice to cut through the richness of the cream.
The Science of Tenderness: Why Pounding and Searing Matter
You might wonder why we don’t just throw the whole breast into the pan. Chicken breast is composed of long muscle fibers. When exposed to heat, these fibers contract. If the breast is thick in the middle and thin at the edges, the edges will be “sawdust dry” by the time the center reaches a safe temperature.
By pounding the meat, you break down some of these tough fibers and create a uniform surface area. This allows for a fast, high-heat cook time, which locks in moisture.
The sear is equally important. Known as the Maillard Reaction, this chemical reaction between amino acids and reducing sugars gives browned food its distinctive flavor. Without the sear, you are missing out on the savory, “umami” complexity that makes a dish taste professional.
Flavor Variations to Keep Things Fresh
Once you have mastered the base recipe, the possibilities are endless. Here are five ways to twist this recipe for different moods:
1. The Tuscan Twist
Add a handful of sun-dried tomatoes and two cups of fresh baby spinach to the sauce in Step 5. The acidity of the tomatoes and the earthiness of the spinach turn this into a “Marry Me Chicken” style dish that is visually stunning.
2. Mushroom Infusion
Sauté 8 ounces of sliced cremini or shiitake mushrooms in the pan before adding the garlic. The mushrooms soak up the cream and add a meaty, earthy depth that pairs perfectly with the garlic.
3. The “Zingy” Lemon Garlic
Increase the lemon influence by adding the zest of one whole lemon and a tablespoon of capers to the sauce. This mimics a Chicken Piccata but with a creamy, decadent finish.
4. Spicy Garlic Buffalo
Whisk in two tablespoons of Frank’s RedHot or your favorite buffalo sauce into the cream. This creates a “creamy buffalo” profile that is addictive when served over celery-root puree or mashed potatoes.
5. Dairy-Free Alternative
To make this dairy-free and Paleo-friendly, swap the heavy cream for full-fat canned coconut milk and use nutritional yeast instead of Parmesan cheese. Use ghee or avocado oil instead of butter. The result is surprisingly similar in richness!
What to Serve with Creamy Garlic Chicken
A sauce this good deserves a vehicle to soak it up. Here are the best pairings based on your dietary preferences:
For the Pasta Lovers
- Fettuccine or Linguine: The classic choice. The wide noodles hold the garlic cream sauce beautifully.
- Penne Rigate: The ridges on the penne are designed to trap sauce inside and out.
- Angel Hair: If you want something light and delicate.
For the Low-Carb/Keto Crowd
- Zucchini Noodles (Zoodles): Lightly sautéed for 2 minutes so they stay “al dente.”
- Roasted Cauliflower: The nuttiness of roasted cauliflower complements the garlic.
- Steamed Asparagus or Broccoli: These green veggies provide a fresh, crunchy contrast to the rich sauce.
For the Comfort Food Seekers
- Garlic Mashed Potatoes: Double down on the garlic. Pouring the extra chicken sauce over a mountain of mashed potatoes is pure heaven.
- Crusty Sourdough Bread: Essential for “mopping” the plate.
- Wild Rice Pilaf: The floral notes of wild rice add a sophisticated touch to the meal.
The Importance of Garlic: Fresh vs. Jarred
In a recipe where “Garlic” is in the title, the quality of your garlic is paramount.
Fresh Garlic: This is always the winner. When you mince a fresh clove, you release allicin, the compound responsible for that pungent, spicy garlic kick. For this recipe, using a garlic press is actually beneficial because it breaks the cells down further, releasing more oils into the cream.
Jarred Minced Garlic: While convenient, jarred garlic is often preserved in citric acid or water, which dulls its flavor and gives it a slightly metallic aftertaste. If you must use it, double the amount called for in the recipe.
Roasted Garlic: For a sweeter, more mellow flavor profile, you can mash a head of roasted garlic into the cream sauce instead of sautéing fresh cloves. This creates a “Caramelized Creamy Garlic Chicken” that is incredibly luxurious.
Troubleshooting Common Issues
Even the best cooks run into hiccups. Here is how to fix common problems with this dish:
“My sauce is too thin!”
If your sauce looks like soup, don’t panic. Let it simmer for another 3-5 minutes without the chicken. The water in the cream will evaporate, thickening the fats. Alternatively, whisk in an extra tablespoon of Parmesan cheese or a “slurry” made of 1 teaspoon cornstarch and 1 teaspoon cold water.
“My sauce curdled/separated!”
This usually happens if the heat is too high when you add the cream or if you use low-fat milk instead of heavy cream. Heavy cream has enough fat to withstand boiling, but milk does not. To fix a broken sauce, remove it from the heat and whisk in a splash of room-temperature cream very quickly.
“The chicken is tough.”
This is a sign of overcooking. Next time, use your meat thermometer and pull the chicken out at 160°F. The “carryover cooking” while it rests will bring it to the safe 165°F mark. Also, ensure you pounded the chicken to an even thickness.
Meal Prep and Storage Tips
This dish is a meal-prepper’s dream because the sauce keeps the chicken from drying out during reheating.
- Refrigerator: Store leftovers in an airtight container for up to 3 days.
- Freezing: You can freeze this dish, but be aware that cream sauces can sometimes change texture (becoming slightly grainy) when thawed. To minimize this, freeze in a vacuum-sealed bag.
- Reheating: Avoid the microwave if possible, as it tends to make chicken rubbery. Instead, place the chicken and sauce in a small skillet over low heat. Add a splash of water or milk to loosen the sauce and cover with a lid until heated through.
Wine Pairing Guide
To elevate your easy dinner into a full dining experience, consider these wine pairings:
- Chardonnay: Specifically an oaked Chardonnay. The buttery notes of the wine mirror the cream sauce, while the acidity cuts through the fat.
- Pinot Grigio: A crisp, dry white that acts as a palate cleanser between rich, garlicky bites.
- Sauvignon Blanc: If you’ve added lemon or herbs to your chicken, the citrusy notes of a Sauvignon Blanc will sing.
- Light Red (Pinot Noir): If you prefer red wine, stick to a light-bodied Pinot Noir. It won’t overwhelm the delicate flavor of the chicken.
Nutritional Breakdown (Per Serving)
While the exact numbers depend on the brands you use, a standard serving of this Creamy Garlic Chicken (without pasta) typically looks like this:
- Calories: 450 – 550 kcal
- Protein: 35g – 40g
- Fats: 30g – 35g
- Carbohydrates: 8g – 12g (Lower if you skip the flour dredge)
- Sodium: 600mg (Adjustable based on broth and salt usage)
This makes it an excellent choice for those on a high-protein diet, providing satiety and essential nutrients like Vitamin B12, Phosphorus, and Selenium.
Why Garlic is Good for You
Beyond its incredible flavor, garlic is a nutritional powerhouse. It has been used for centuries for its medicinal properties. It contains manganese, Vitamin C, and Vitamin B6. Most importantly, it is known for its immune-boosting properties. Including plenty of garlic in your dinner isn’t just about taste—it’s a boost for your well-being, especially during the colder months.
Cooking for a Crowd: How to Scale
If you are hosting a dinner party or a large family gathering, this recipe scales beautifully.
- The Pan: Use a large roasting pan that can go over two burners on your stove, or sear the chicken in batches and make a double batch of sauce in a Dutch oven.
- The Oven Method: If cooking for 10 or more, sear the chicken in a pan to get the color, then place all the cutlets in a large baking dish. Pour the prepared garlic cream sauce over them and finish in a 375°F oven for 15 minutes. This ensures everyone gets a hot plate at the same time.
Frequently Asked Questions
Can I use chicken thighs instead? Absolutely! Chicken thighs are more forgiving than breasts because they have a higher fat content. Use boneless, skinless thighs and follow the same searing and saucing instructions. They may require an extra 2-3 minutes of cook time.
What can I use instead of heavy cream? Half-and-half can work, but the sauce won’t be as thick or stable. Avoid skim milk. For a lighter version, you can use Greek yogurt whisked in at the very end (off the heat) to prevent curdling.
Is this dish gluten-free? To make it gluten-free, simply swap the all-purpose flour for a gluten-free flour blend, cornstarch, or almond flour. Or, skip the dredging step entirely; just season the chicken and sear it directly in the oil.
How do I prevent the garlic from burning? Garlic burns very quickly because of its low water content and high sugar content. Always have your liquid (broth or cream) measured and ready to go before you put the garlic in the pan. As soon as you smell that wonderful aroma, pour in the liquid to stop the browning process.
The Art of Plating
We eat with our eyes first. To make this “Easy Dinner” look like a $30 restaurant entree:
- The Base: Place a neat swirl of pasta or a mound of mashed potatoes in the center of a wide, shallow bowl.
- The Protein: Lean two chicken cutlets against the starch, overlapping them slightly.
- The Sauce: Generously ladle the garlic cream sauce over the bottom half of the chicken, allowing it to pool around the base.
- The Color: Don’t skip the fresh parsley! The vibrant green against the ivory sauce makes the dish pop. Add a crack of fresh black pepper over the top for texture.
- The Garnish: Place a lemon wedge on the side of the plate for a professional finish.
Conclusion: Making Memories Around the Table
In the hustle and bustle of modern life, the dinner table remains one of the few places where we can slow down and connect. A dish like Tender Creamy Garlic Chicken Breast facilitates that connection. It’s comforting, it’s impressive, and most importantly, it doesn’t leave the cook exhausted.
By mastering the techniques of pounding, searing, and deglazing, you are not just following a recipe—you are building a culinary foundation. This chicken dish will quickly become a “requested favorite” in your household, a reliable go-to that never fails to satisfy.
So, tonight, skip the takeout. Put on your favorite playlist, crack open a bottle of Chardonnay, and treat yourself to a dinner that is as easy to make as it is delightful to eat. You deserve a gourmet meal, and with this guide, you have everything you need to create it.
Final Pro-Tip for the Road
Always let your chicken rest for 3-5 minutes before serving. This allows the internal juices to redistribute throughout the meat. If you cut into it the second it leaves the pan, all that precious moisture will spill out onto the plate, leaving you with dry meat. Patience is the final ingredient to the perfect chicken dinner.
Enjoy your Easy Dinner Tonight!