7 Chicken Game Day Snacks Everyone Will Eat
Game day is more than just a sports event; it is a cultural ritual defined by camaraderie, tension, and, most importantly, the food. While many snacks vie for a spot on the coffee table, chicken remains the undisputed MVP of the spread. It’s versatile, lean enough to handle heavy sauces, and capable of transforming into everything from a crispy bite to a creamy dip.
To host a truly legendary watch party, you need a lineup of snacks that covers the spectrum of flavors: spicy, sweet, savory, and crunchy. Below is an exhaustive guide to seven chicken-based game day snacks that are guaranteed to disappear before halftime. These recipes aren’t just instructions; they are blueprints for culinary victory.
1. The “Triple-Threat” Buffalo Wings (Baked, Fried, or Air-Fried)
No game day is complete without Buffalo wings. The “Triple-Threat” refers to the three methods of cooking provided here, ensuring you get that restaurant-quality crunch regardless of your kitchen setup. The secret to a great wing isn’t just the sauce; it’s the preparation of the skin to ensure maximum crispiness.
The Ingredients
The Wings:
- 4 lbs Chicken Wings (party style, split into flats and drums)
- 2 tbsp Aluminum-free Baking Powder (Crucial for the baked method to achieve crunch)
- 1 tsp Kosher Salt
- 1 tsp Garlic Powder
- 1/2 tsp Black Pepper
The Signature Buffalo Sauce:
- 3/4 cup Frank’s RedHot Original Sauce (or your preferred cayenne pepper sauce)
- 1/2 cup Unsalted Butter (one stick)
- 1 tbsp White Vinegar
- 1/4 tsp Worcestershire Sauce
- 1/4 tsp Cayenne Pepper (optional for extra heat)
- 1/2 tsp Garlic Powder
The Cooling Blue Cheese Dip:
- 1/2 cup Sour Cream
- 1/2 cup Mayonnaise
- 1/2 cup Crumbled Blue Cheese
- 1 tbsp Lemon Juice
- 1 clove Garlic, minced
- Salt and Pepper to taste
How to Cook: Detailed Instructions
Step 1: Preparation and Drying The enemy of a crispy wing is moisture. Remove the wings from the packaging and pat them extremely dry with paper towels. If you have time, place them on a wire rack over a baking sheet and leave them uncovered in the fridge for 4-6 hours. This “air-dries” the skin.
Step 2: The Breading (For Baking/Air-Frying) Toss the dried wings in a large bowl with the baking powder, salt, garlic powder, and pepper. The baking powder raises the pH level of the skin, allowing the proteins to break down more efficiently and create a blistered, crunchy texture similar to deep-frying.
Step 3: Cooking Methods
- Method A: The Oven Bake: Pre-heat your oven to 425°F (220°C). Place the wings on a wire rack set over a foil-lined baking sheet. Bake for 45–50 minutes, flipping halfway through, until the skin is golden brown and shattered-glass crispy.
- Method B: The Deep Fry: Heat neutral oil (peanut or canola) in a heavy pot to 375°F. Fry the wings in batches for 8–10 minutes until they reach an internal temp of 165°F and the skin is dark gold.
- Method C: The Air Fryer: Arrange wings in a single layer. Cook at 400°F for 20 minutes, shaking the basket every 5 minutes until incredibly crispy.
Step 4: The Sauce Emulsion In a small saucepan over medium heat, melt the butter. Whisk in the hot sauce, vinegar, Worcestershire, garlic powder, and cayenne. Do not let it boil vigorously; you want a smooth, emulsified glaze.
Step 5: The Toss Once the wings are cooked, immediately transfer them to a large stainless steel bowl. Pour the warm sauce over them and toss vigorously. The heat from the wings helps the sauce adhere to the nooks and crannies of the skin. Serve immediately with the blue cheese dip and celery sticks.
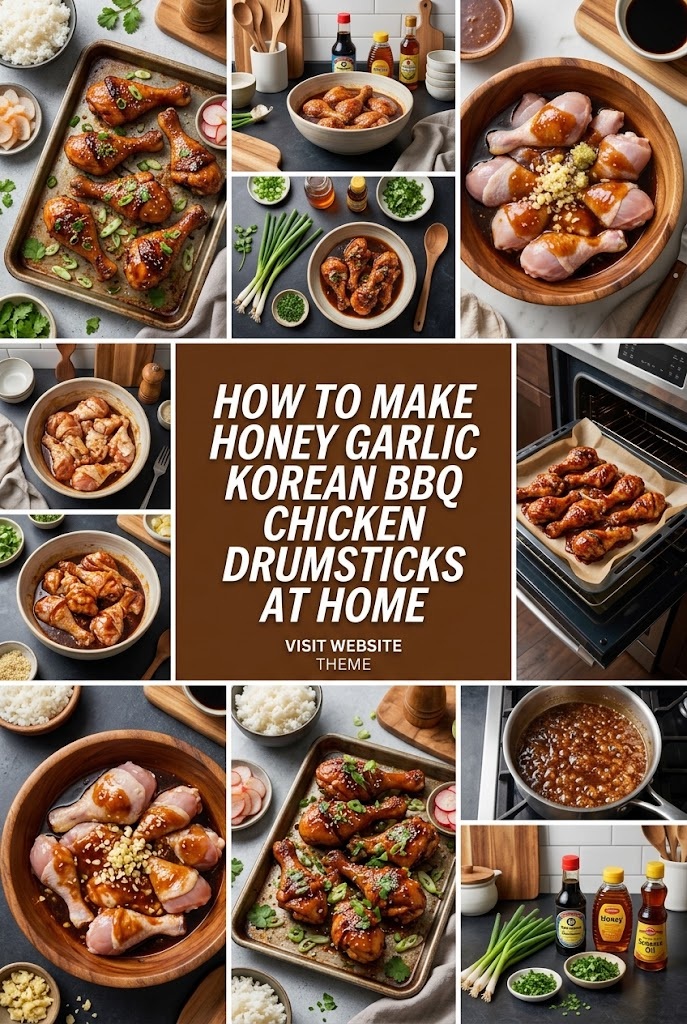
2. Honey Garlic Chicken Sliders with Applewood Slaw
Sliders are the ultimate handheld meal for game day. They offer a substantial bite without the commitment of a full-sized burger. These sliders feature succulent chicken thighs glazed in a sticky honey-garlic sauce, balanced by a bright, acidic slaw.
The Ingredients
The Chicken:
- 2 lbs Boneless, Skinless Chicken Thighs (trimmed and cut into slider-sized pieces)
- 1/2 cup Cornstarch
- 1 tsp Smoked Paprika
- 1 tsp Salt
- 2 tbsp Vegetable Oil (for searing)
The Honey Garlic Glaze:
- 1/2 cup Honey
- 1/4 cup Soy Sauce (low sodium)
- 4 cloves Garlic, minced
- 1 tbsp Fresh Ginger, grated
- 1 tbsp Rice Vinegar
- 1 tsp Toasted Sesame Oil
- 1 tsp Sriracha (optional)
The Slaw:
- 2 cups Shredded Cabbage (mix of red and green)
- 1 Granny Smith Apple, julienned
- 1/4 cup Apple Cider Vinegar
- 2 tbsp Olive Oil
- 1 tbsp Sugar
- Salt and Pepper
The Assembly:
- 12 Brioche Slider Buns
- Pickle Chips
- 2 tbsp Melted Butter (for toasting buns)
How to Cook: Detailed Instructions
Step 1: The Slaw (Do this first) In a medium bowl, whisk together the apple cider vinegar, olive oil, sugar, salt, and pepper. Toss in the cabbage and julienned apple. Let this sit in the fridge for at least 30 minutes. The acidity will soften the cabbage and prevent the apple from browning.
Step 2: Searing the Chicken Dredge the chicken thigh pieces in a mixture of cornstarch, smoked paprika, and salt. Shake off any excess. In a large skillet, heat the oil over medium-high heat. Sear the chicken for 5–6 minutes per side until deeply browned and cooked through. Remove chicken and wipe out the excess oil from the pan.
Step 3: Creating the Glaze In the same skillet, combine the honey, soy sauce, garlic, ginger, rice vinegar, and sriracha. Bring to a simmer over medium heat. Let the sauce reduce for 3–4 minutes until it becomes thick and syrupy.
Step 4: The Glazing Process Add the cooked chicken back into the skillet. Toss and turn the pieces until every inch is coated in the sticky glaze. The cornstarch coating on the chicken will help the sauce “grab” onto the meat.
Step 5: The Bun Toast Brush the insides of the brioche buns with melted butter. Toast them in a dry pan or under a broiler for 60 seconds until golden. This creates a barrier so the juices don’t make the bread soggy.
Step 6: Assembly Place a piece of honey garlic chicken on the bottom bun. Top with two pickle chips and a generous heap of the applewood slaw. Crown it with the top bun and secure with a toothpick.
3. Loaded Chicken Nachos with Beer Cheese Queso
Nachos are a game day staple, but the “shredded cheese and microwave” method leads to disappointment and soggy chips. To do it right, we use a homemade beer cheese queso and layered architecture.
The Ingredients
The Chicken:
- 1 Rotisserie Chicken, shredded (or 3 poached chicken breasts)
- 1 tbsp Taco Seasoning
- 1/4 cup Chicken Broth
- 1 lime, juiced
The Beer Cheese Queso:
- 2 tbsp Butter
- 2 tbsp All-purpose Flour
- 1 cup Whole Milk
- 1/2 cup Lager-style Beer
- 8 oz Sharp Cheddar Cheese, freshly grated (pre-shredded has cellulose and won’t melt as well)
- 4 oz Monterey Jack Cheese, freshly grated
- 1/2 tsp Smoked Paprika
- A pinch of Cayenne
The Nacho Foundation:
- 1 large bag Thick-cut Tortilla Chips
- 1 can Black Beans, drained and rinsed
- 1 cup Corn (frozen or canned)
- 2 Jalapeños, sliced thin
- 1/2 cup Red Onion, finely diced
- 1 cup Cherry Tomatoes, quartered
- Fresh Cilantro and Sour Cream for garnish
How to Cook: Detailed Instructions
Step 1: The Zesty Shredded Chicken Place your shredded chicken in a skillet over medium heat. Add the taco seasoning, lime juice, and chicken broth. Stir and cook for 5 minutes. The broth ensures the chicken stays moist while the spices infuse into the meat. Set aside.
Step 2: The Beer Cheese Queso (The “Liquid Gold”) In a saucepan, melt the butter over medium heat. Whisk in the flour and cook for 1 minute (don’t let it brown). Slowly whisk in the milk and beer. Continue whisking until the mixture thickens and begins to bubble. Turn the heat to low. Add the cheese one handful at a time, stirring constantly until smooth. Stir in the paprika and cayenne. Keep warm.
Step 3: The Architecture of the Layers Preheat your oven to 400°F. Do not just pile chips in a heap. On a large sheet pan, spread half of the chips. Top with half of the chicken, half of the beans, half of the corn, and a generous drizzle of the queso. Add the second layer of chips and repeat the process.
Step 4: The Bake Place the pan in the oven for 8–10 minutes. This heats the chips and sets the toppings. It also slightly roasts the corn and beans.
Step 5: The Fresh Finishes Remove from the oven. Immediately top with the fresh jalapeños, red onions, and tomatoes. Drizzle with more queso if desired. Finish with dollops of sour cream and a heavy sprinkle of cilantro. Serve on the sheet pan for the ultimate communal experience.
4. Nashville Hot Popcorn Chicken
Popcorn chicken is the perfect “mindless” snack—easy to pick up and eat without looking away from the screen. This version brings the heat with a Nashville-style spicy oil that coats the crispy breading.
The Ingredients
The Chicken Marinade:
- 2 lbs Chicken Breast, cut into 1-inch cubes
- 1 cup Buttermilk
- 1 tbsp Hot Sauce (like Louisiana or Crystal)
- 1 tsp Salt
- 1 tsp Garlic Powder
The Breading:
- 2 cups All-purpose Flour
- 1/2 cup Cornstarch
- 1 tbsp Garlic Powder
- 1 tbsp Onion Powder
- 1 tsp Salt
- 1 tsp Black Pepper
The Nashville Hot Oil:
- 1/2 cup Frying Oil (hot, taken from the pot after cooking)
- 3 tbsp Cayenne Pepper (adjust based on heat tolerance)
- 1 tbsp Brown Sugar
- 1 tsp Smoked Paprika
- 1/2 tsp Garlic Powder
How to Cook: Detailed Instructions
Step 1: The Brine Whisk together the buttermilk, hot sauce, salt, and garlic powder. Add the chicken cubes and toss to coat. Cover and refrigerate for at least 1 hour (up to 4 hours). The buttermilk tenderizes the breast meat, ensuring it stays juicy even when fried.
Step 2: The Dredging Process In a large bowl or a zip-top bag, combine the flour, cornstarch, and spices. Working in small batches, remove chicken from the buttermilk and drop into the flour. Shake vigorously. For “extra-craggy” bits, drizzle 2 tablespoons of the buttermilk marinade into the flour mixture and mix it with a fork before dredging; this creates little clumps that stick to the chicken and turn into crunchy nuggets.
Step 3: The Deep Fry Heat 2 inches of neutral oil in a heavy-bottomed pot to 350°F. Fry the chicken in batches for 4–5 minutes until golden brown. Do not overcrowd the pot, or the temperature will drop, resulting in greasy chicken. Drain on a wire rack (not paper towels, which cause steaming).
Step 4: The Nashville Glaze In a heat-proof bowl, combine the cayenne, brown sugar, paprika, and garlic powder. Carefully ladle 1/2 cup of the hot frying oil into the spices. Whisk until the sugar is dissolved and the oil is dark red.
Step 5: The Finishing Touch Place the fried popcorn chicken in a large bowl. Drizzle the hot oil over the chicken and toss quickly to coat. The sugar in the oil provides a slight sweetness that balances the intense heat of the cayenne. Serve with white bread slices and dill pickle rounds.
5. Cheesy Chicken Jalapeño Popper Dip
Dips are the cornerstone of any party spread. This recipe combines the flavors of a jalapeño popper—cream cheese, bacon, and heat—with shredded chicken to turn it into a hearty meal-style snack.
The Ingredients
The Base:
- 2 cups Cooked Chicken, shredded (rotisserie works great)
- 16 oz Cream Cheese (2 blocks), softened to room temperature
- 1/2 cup Sour Cream
- 1/2 cup Mayonnaise
- 1 cup Sharp Cheddar Cheese, shredded
- 1 cup Monterey Jack Cheese, shredded
The Flavor Makers:
- 4-5 Large Jalapeños, deseeded and finely diced (keep seeds if you want it spicy)
- 6 slices Bacon, cooked crispy and crumbled
- 3 Green Onions, sliced
- 1 tsp Garlic Powder
- 1/2 tsp Cumin
- Salt and Pepper to taste
The Topping:
- 1/2 cup Panko Breadcrumbs
- 2 tbsp Melted Butter
- 1/4 cup Parmesan Cheese, grated
How to Cook: Detailed Instructions
Step 1: Creaming the Base In a large mixing bowl, beat the softened cream cheese, sour cream, and mayonnaise together until smooth and fluffy. This can be done with a hand mixer or a sturdy spatula.
Step 2: Folding in the Ingredients Fold in the shredded chicken, cheddar, Monterey Jack, diced jalapeños, half of the crumbled bacon, and the green onions. Season with garlic powder, cumin, salt, and pepper. Ensure the chicken is evenly distributed throughout the cheese mixture.
Step 3: Preparing the Topping In a small bowl, mix the Panko breadcrumbs, melted butter, and parmesan cheese. This will create a crunchy crust that contrasts with the creamy interior.
Step 4: The Bake Spread the mixture into a 9×9 inch baking dish or a cast-iron skillet. Sprinkle the remaining bacon on top, followed by the Panko-parmesan mixture. Bake at 375°F for 20–25 minutes until the edges are bubbling and the top is a deep golden brown.
Step 5: Serving Let the dip rest for 5 minutes before serving (it will be extremely hot). Serve with sturdy dippers like toasted baguette slices, pita chips, or thick tortilla chips.
6. Sticky Korean Fried Chicken Bites (Yangnyeom Chicken)
For those who want something different from the standard American Buffalo flavor, Korean Fried Chicken (KFC) offers a unique “double-fry” technique that results in a paper-thin, ultra-crunchy crust and a complex sweet-spicy glaze.
The Ingredients
The Chicken:
- 2 lbs Chicken Thighs, cut into bite-sized pieces
- 1/2 tsp Salt
- 1/2 tsp Black Pepper
- 1 tsp Fresh Ginger, minced
- 1/2 cup Potato Starch (Cornstarch works, but potato starch is crunchier)
The Yangnyeom Sauce:
- 3 tbsp Gochujang (Korean red chili paste)
- 3 tbsp Ketchup
- 2 tbsp Honey
- 2 tbsp Brown Sugar
- 1 tbsp Soy Sauce
- 2 cloves Garlic, minced
- 1 tbsp Toasted Sesame Oil
Garnish:
- Toasted Sesame Seeds
- Sliced Scallions
How to Cook: Detailed Instructions
Step 1: Seasoning Toss the chicken bites with salt, pepper, and ginger. Let them sit for 15 minutes. The ginger is traditional and helps cut through the richness of the fried meat.
Step 2: The Starch Coating Dredge the chicken pieces in the potato starch. Press the starch into the meat to ensure it sticks. Unlike a flour batter, potato starch creates a very light, crispy shell.
Step 3: The First Fry Heat oil to 325°F. Fry the chicken for 5–7 minutes. At this stage, the chicken will be pale and cooked through, but not yet very crunchy. Remove and let rest on a rack for 2-3 minutes.
Step 4: The Second Fry (The Secret Step) Increase the oil heat to 375°F. Put the chicken back in for another 2–3 minutes. This second fry drives out the remaining moisture from the crust, making it stay crunchy even after it’s coated in sauce.
Step 5: Simmering the Sauce While the chicken is resting, combine all sauce ingredients in a large wok or skillet. Bring to a gentle simmer over medium heat until the sugar dissolves and the sauce thickens slightly (about 2 minutes).
Step 6: The Glaze Add the double-fried chicken to the sauce and toss quickly. You want to coat the chicken without soaking it; work fast to maintain the crunch. Sprinkle with sesame seeds and scallions and serve immediately.
7. Crispy Buffalo Chicken Spring Rolls
Think of these as the sophisticated cousin of the chicken wing. All the flavor of Buffalo chicken is wrapped in a thin, crispy shell, making them mess-free and incredibly satisfying to crunch into.
The Ingredients
The Filling:
- 3 cups Cooked Chicken, finely shredded
- 1/2 cup Buffalo Sauce
- 4 oz Cream Cheese, softened
- 1/2 cup Celery, very finely diced (adds essential crunch)
- 1/2 cup Carrots, shredded
- 1 cup Shredded Mozzarella Cheese
The Wrappers:
- 1 package Spring Roll Wrappers (not rice paper, look for the wheat-based ones in the freezer section)
- 1 Egg, beaten (for sealing)
- Oil for frying
How to Cook: Detailed Instructions
Step 1: The Filling Mix In a large bowl, mix the shredded chicken, Buffalo sauce, and softened cream cheese until well combined. Stir in the celery, carrots, and mozzarella. The cream cheese acts as a binder, preventing the Buffalo sauce from leaking out during frying.
Step 2: The Rolling Technique Place one spring roll wrapper on a clean surface in a diamond shape. Place about 2 tablespoons of filling in the lower center of the wrapper. Fold the bottom corner over the filling, then fold in the two side corners. Roll tightly toward the top corner. Brush the top corner with the beaten egg and seal it shut. Repeat until all filling is used.
Step 3: The Chilling (Pro Tip) Place the rolled spring rolls on a tray and freeze them for 15 minutes before frying. This “sets” the shape and ensures the cheese inside doesn’t melt and burst through the wrapper before the outside is crispy.
Step 4: Frying Heat 1 inch of oil in a skillet to 350°F. Fry the spring rolls for 3–4 minutes, turning frequently, until they are golden brown on all sides.
Step 5: Serving Serve these vertically in a glass or on a platter with a side of ranch or blue cheese dressing for dipping. They provide a surprising burst of flavor and texture that deviates from the usual game day fare.
The Master Game Plan: Tips for Success
Hosting a game day party is an exercise in logistics. To ensure you aren’t stuck in the kitchen while the winning touchdown is scored, follow these strategic tips:
1. The Prep Timeline
- 24 Hours Before: Make the Blue Cheese Dip and the Applewood Slaw. These flavors improve overnight. Shred your rotisserie chicken for the nachos and dip.
- Morning Of: Cut your chicken for the wings, popcorn chicken, and sliders. Brine the Nashville chicken in buttermilk.
- 2 Hours Before Kickoff: Assemble the spring rolls and keep them in the fridge. Prepare the beer cheese sauce and keep it in a small slow cooker on “warm.”
- 30 Minutes Before Kickoff: Start the frying and baking. Wings take the longest, so get them in the oven first.
2. Maintaining the Crunch
Nothing ruins a game day snack faster than the “soggy factor.” To avoid this, always use wire cooling racks instead of paper towels for fried items. Paper towels trap steam under the food, which softens the crust. Also, serve sauces on the side for items like popcorn chicken if you expect guests to graze over several hours.
3. The “Sauce Station”
Instead of tossing every piece of chicken in one sauce, create a “Wing and Bite Station.” Offer a variety of heat levels (Mild, Medium, Atomic) and unique flavors (Garlic Parm, Lemon Pepper, Teriyaki). Provide plenty of wet naps—chicken snacks are a contact sport.
4. Drink Pairings
- For Buffalo/Spicy Snacks: Light, crisp lagers or IPAs with citrus notes help cut through the heat and vinegar.
- For Honey Garlic/Korean Snacks: A slightly sweet Riesling or a ginger beer (non-alcoholic) complements the ginger and soy profiles perfectly.
- For Cheesy Dips/Nachos: Ambers or Porters have enough body to stand up to the richness of the cheese and beans.
By mastering these seven recipes, you transform your home into the ultimate game day destination. Whether your team wins or loses, your guests will leave feeling like champions, fueled by the best chicken snacks they’ve ever had.